
Getting started
Most ad targeting is done based on fit criteria, retargeting pixels, and hard-to-verify third-party intent data.
It can help you narrow your scope, but there’s little way of knowing whether your ad spend is going to the precise potential buyers you want it to. Until now, that is.
In this playbook, we’ll show you how to automate LinkedIn ad targeting based on buying signals and buyer fit to increase conversions and boost return on ad spend.
What you’ll need:
Common RoomThis is how we’ll create dynamic target audiences based on buying signals and fit criteria. Sign up for free to follow along.
This is how we’ll connect the dots between Common Room and LinkedIn. We’ll need access to Zapier’s Professional plan or higher in this case. Check out our integration docs for step-by-step directions on how to connect Zapier to Common Room and explore other custom data source options.
This is how we’ll serve up our ads to the right buyers. We’ll be using a LinkedIn Ads account. We’ll need to be assigned as both the Account Manager or Campaign Manager on our account, as well as the Company Page Admin or Lead Gen Forms Manager. Check out our integration docs for step-by-step directions on how to connect LinkedIn to Common Room.
Step 1: Build audience creation Zap
First things first.
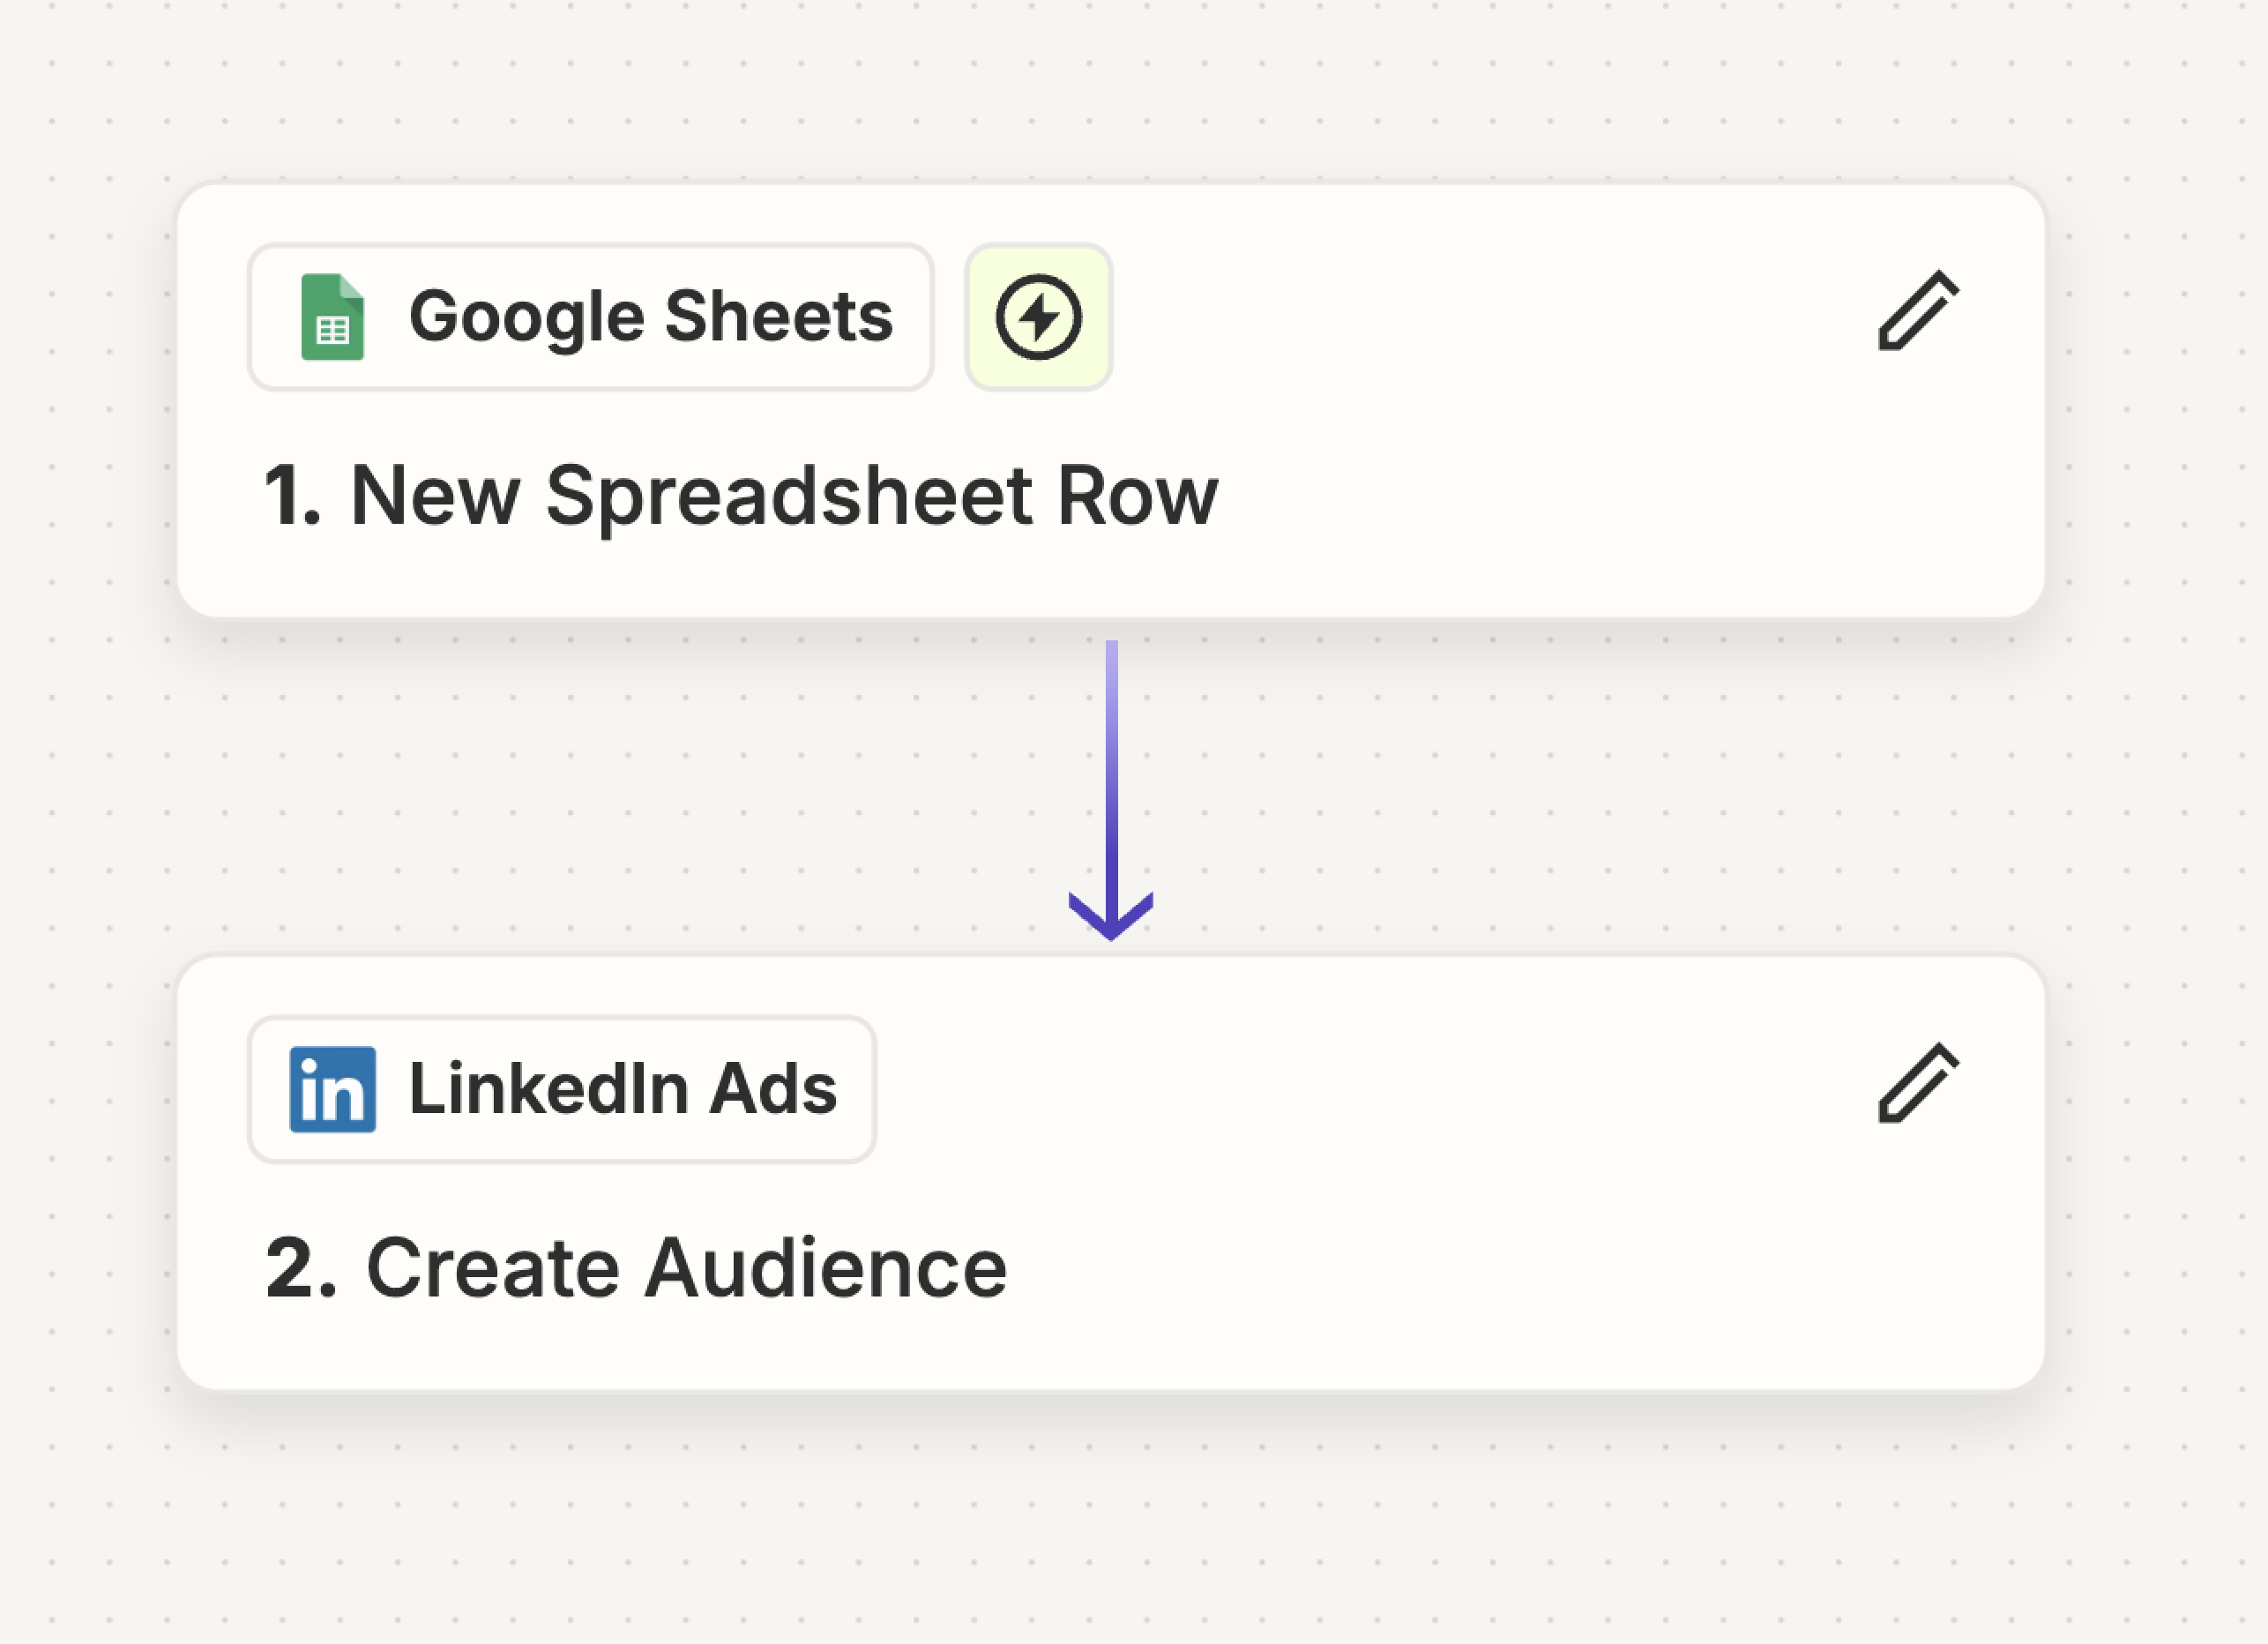
We need to create a task automation—or Zap—in Zapier to create our LinkedIn Ads audiences.
You must use Zapier to create your LinkedIn Ads audiencesIn order to push contacts from Common Room to your LinkedIn Ads account via Zapier, your audiences must be created by Zapier. We know—a bit quirky, but it works!
In this case, we’d use a Google Sheet as our trigger.
We can populate the spreadsheet with audience names and descriptions either directly or via Google Form.

We’d connect our Google Sheet to Zapier and choose New Spreadsheet Row as our trigger event. This way each time we update our spreadsheet, a new audience will be created in our LinkedIn Ads account.
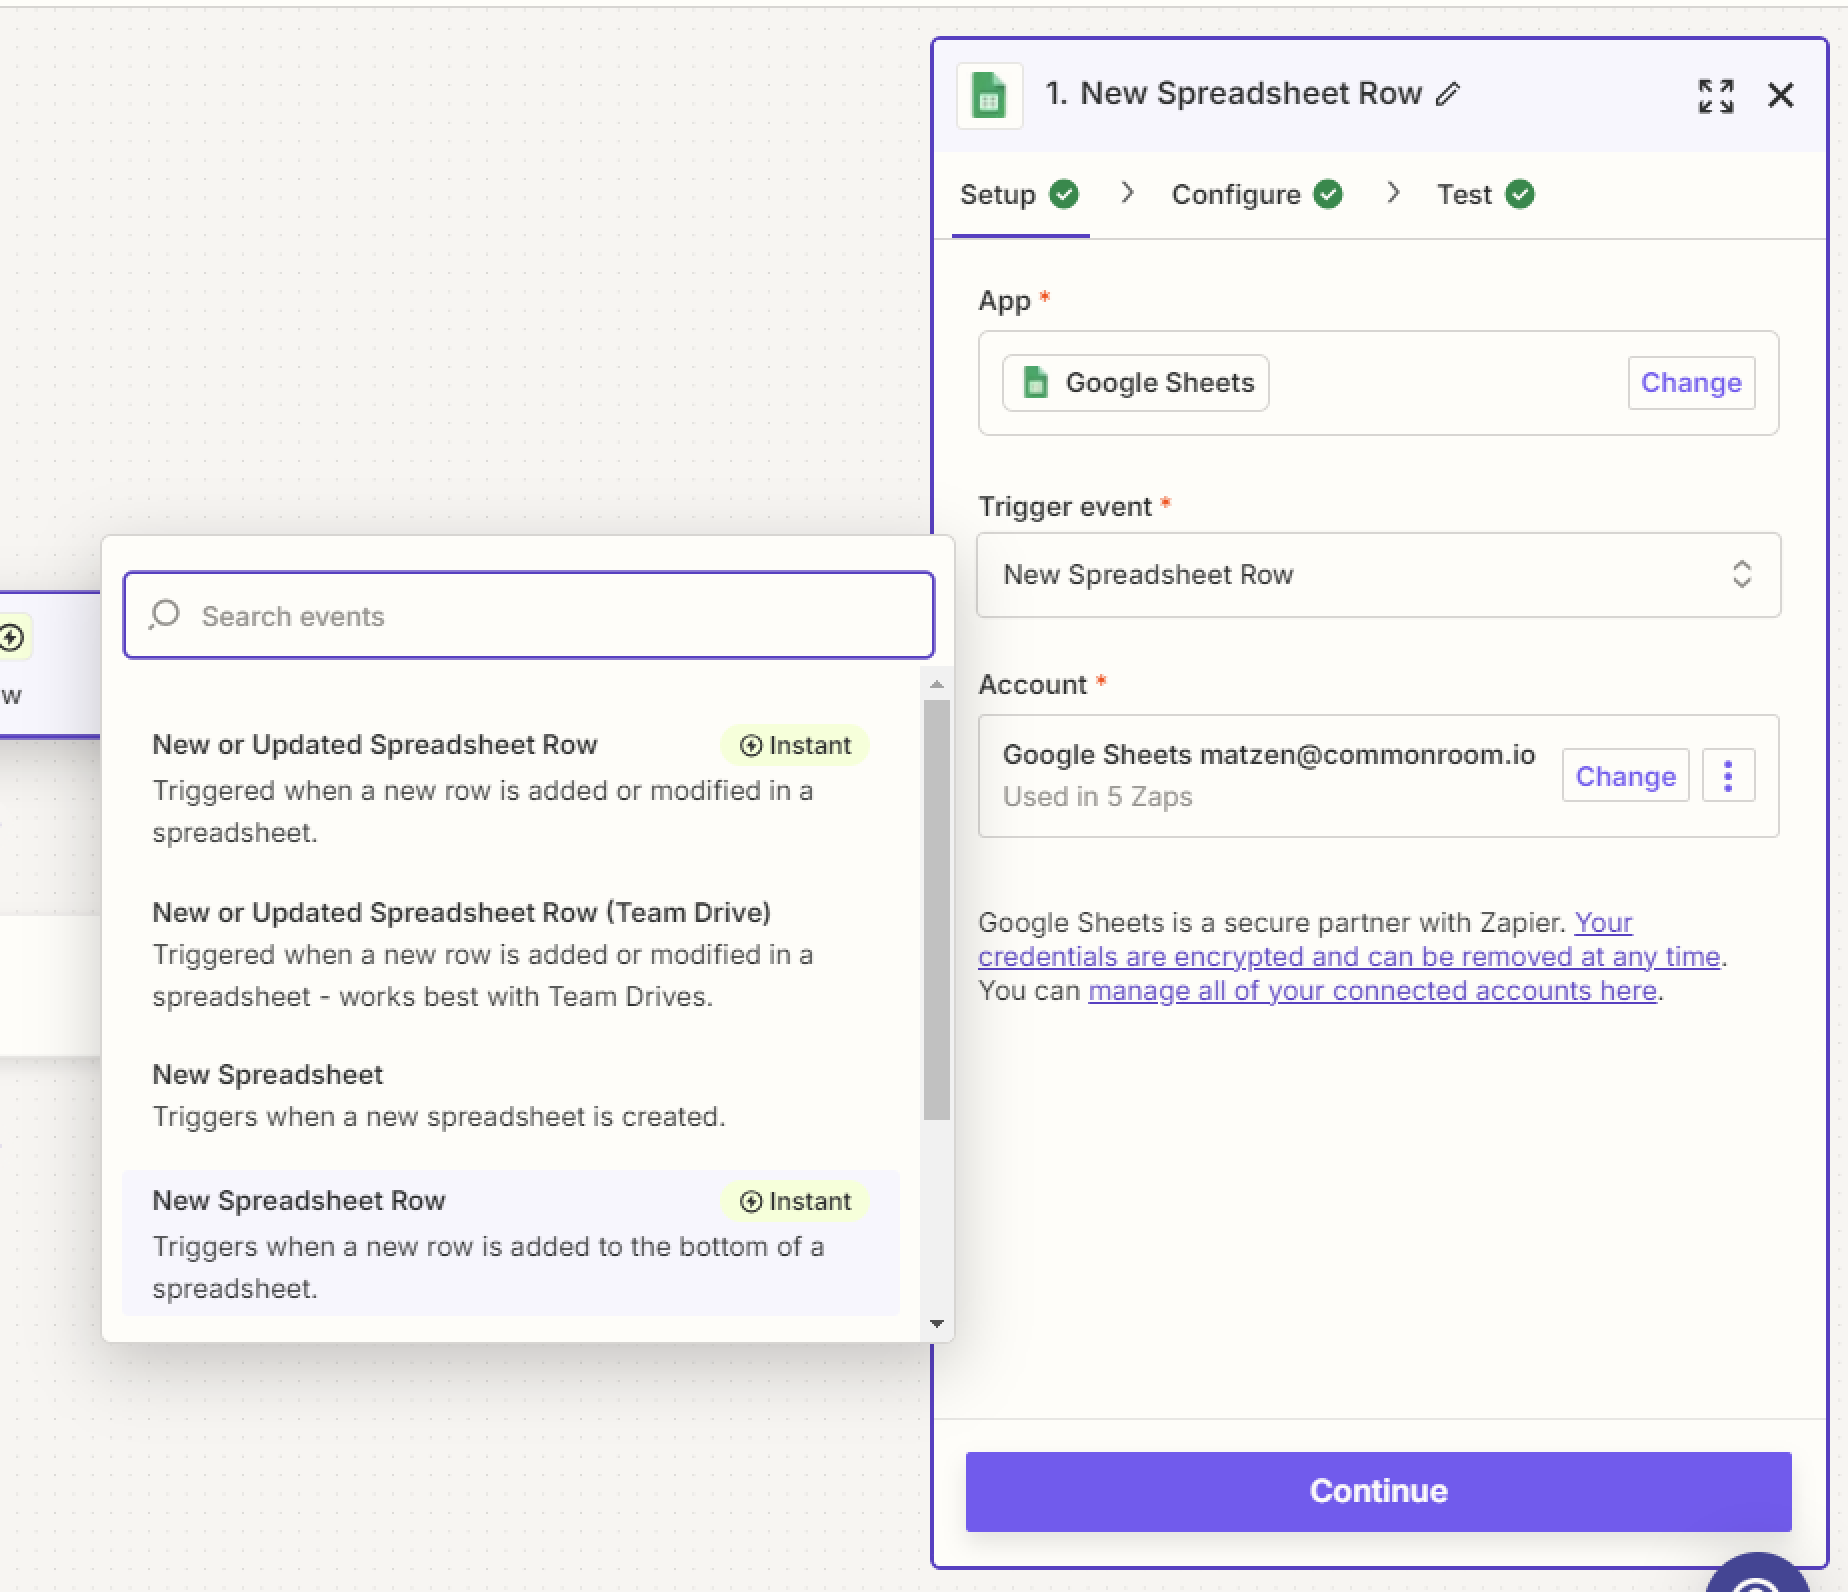
We’d then select the specific spreadsheet where our values will be pulled from.

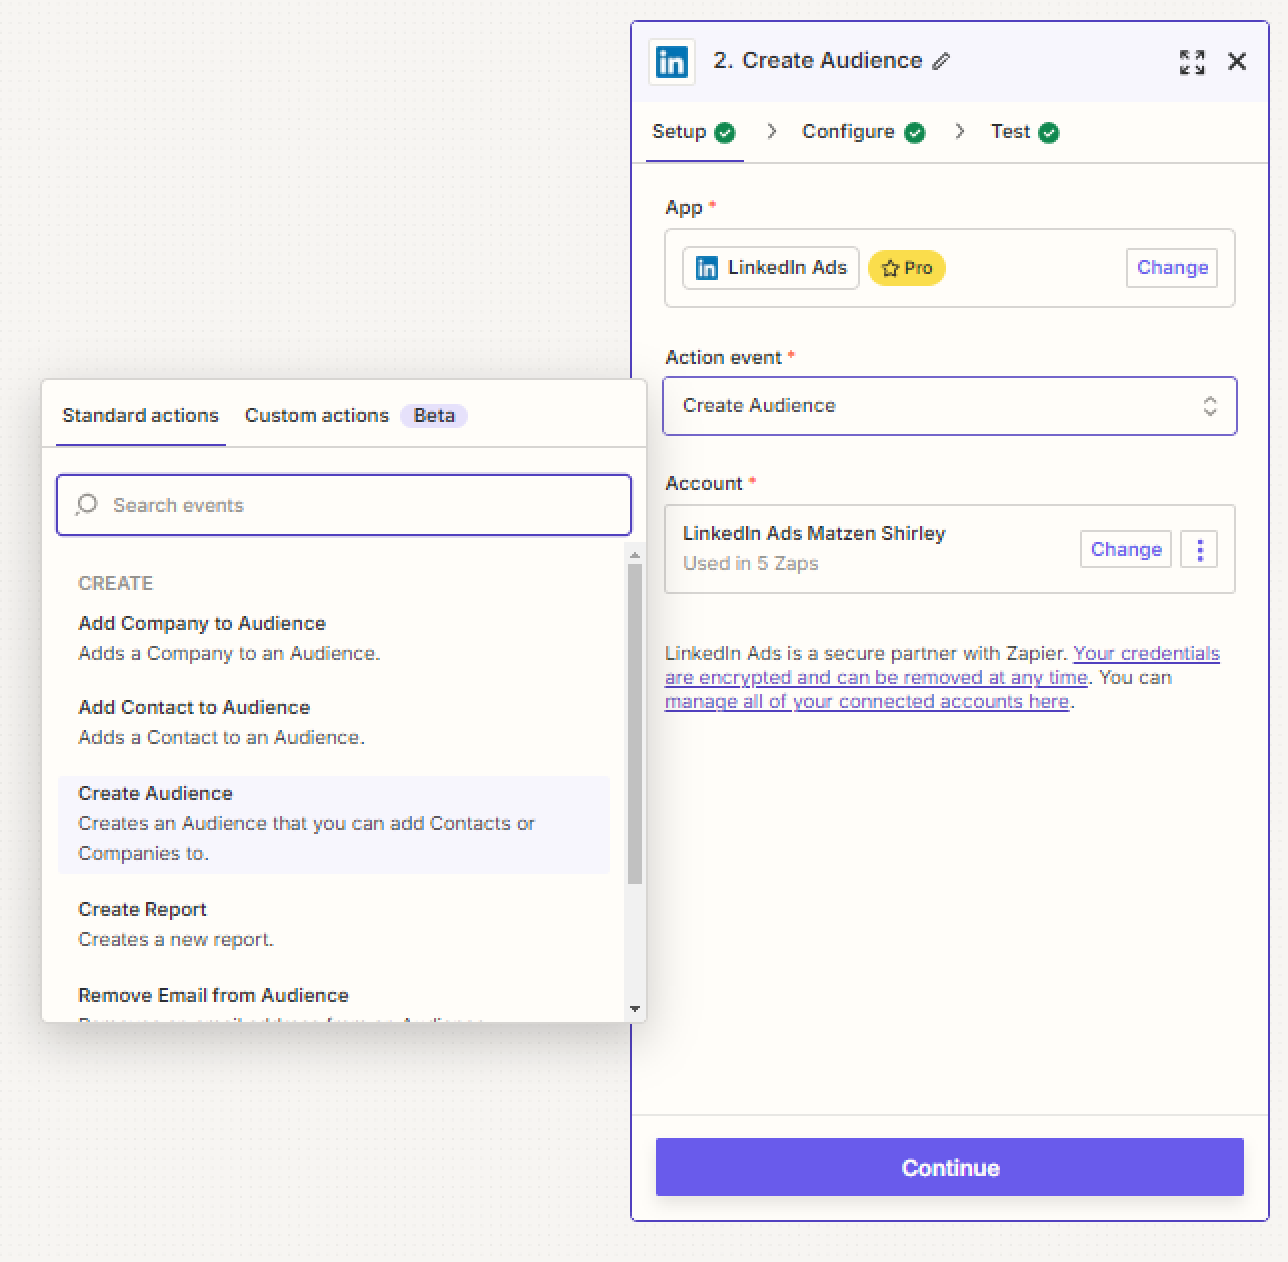
Next we’d set up our action. We’d connect our LinkedIn Ads account to Zapier and choose Create audience as our action event.
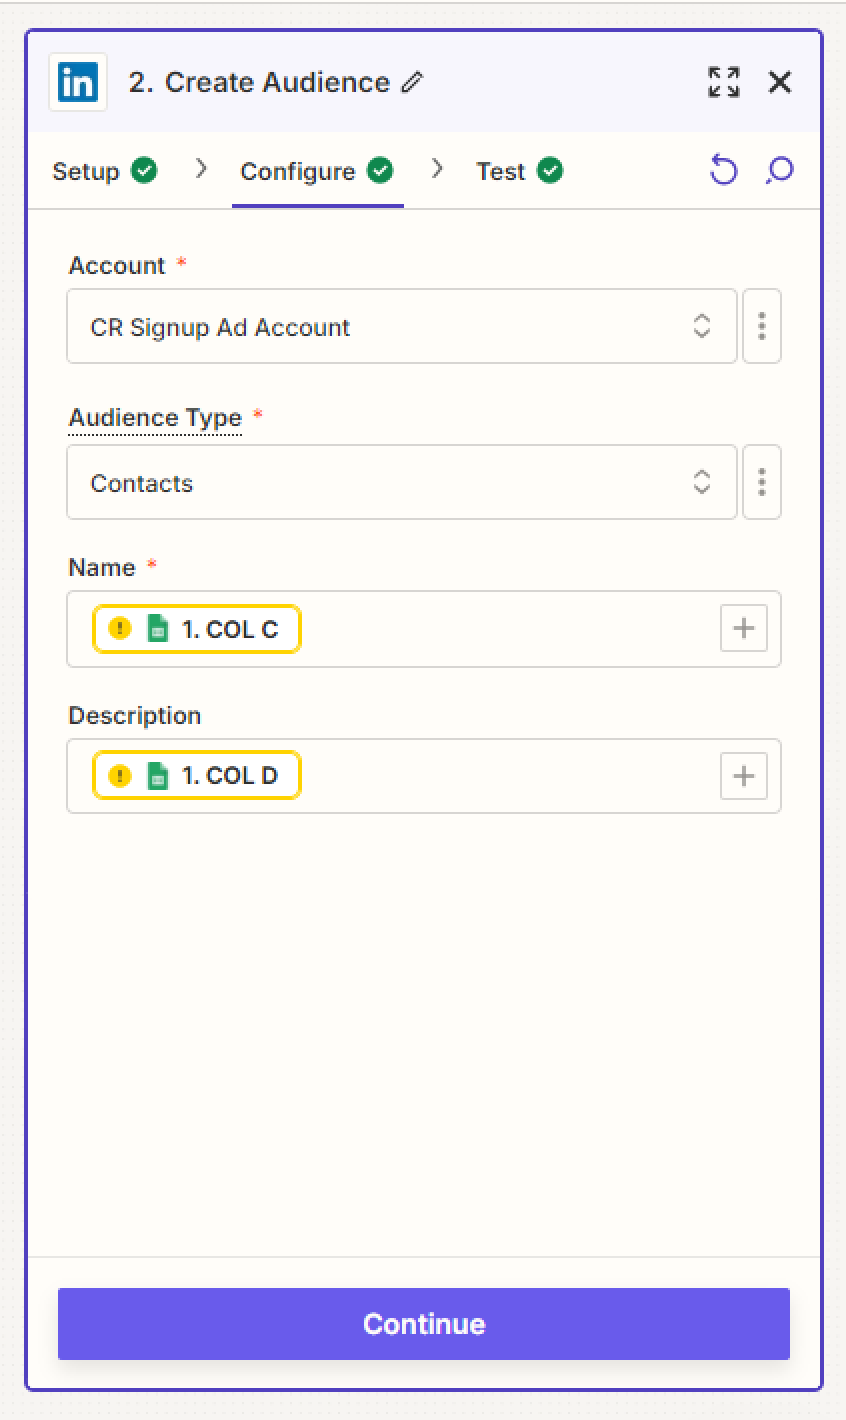
We want to configure our Zap so we’re properly mapping the correct values from our Google Sheet into the Name and Description fields in Zapier. These will both be sent to LinkedIn once our Zap is up and running.
We’d hit Publish and now we’ve got a Zap that will create LinkedIn Ad audiences for us.
Next let’s make sure we’re adding the right people to our audiences.
Step 2: Create ad targeting segment
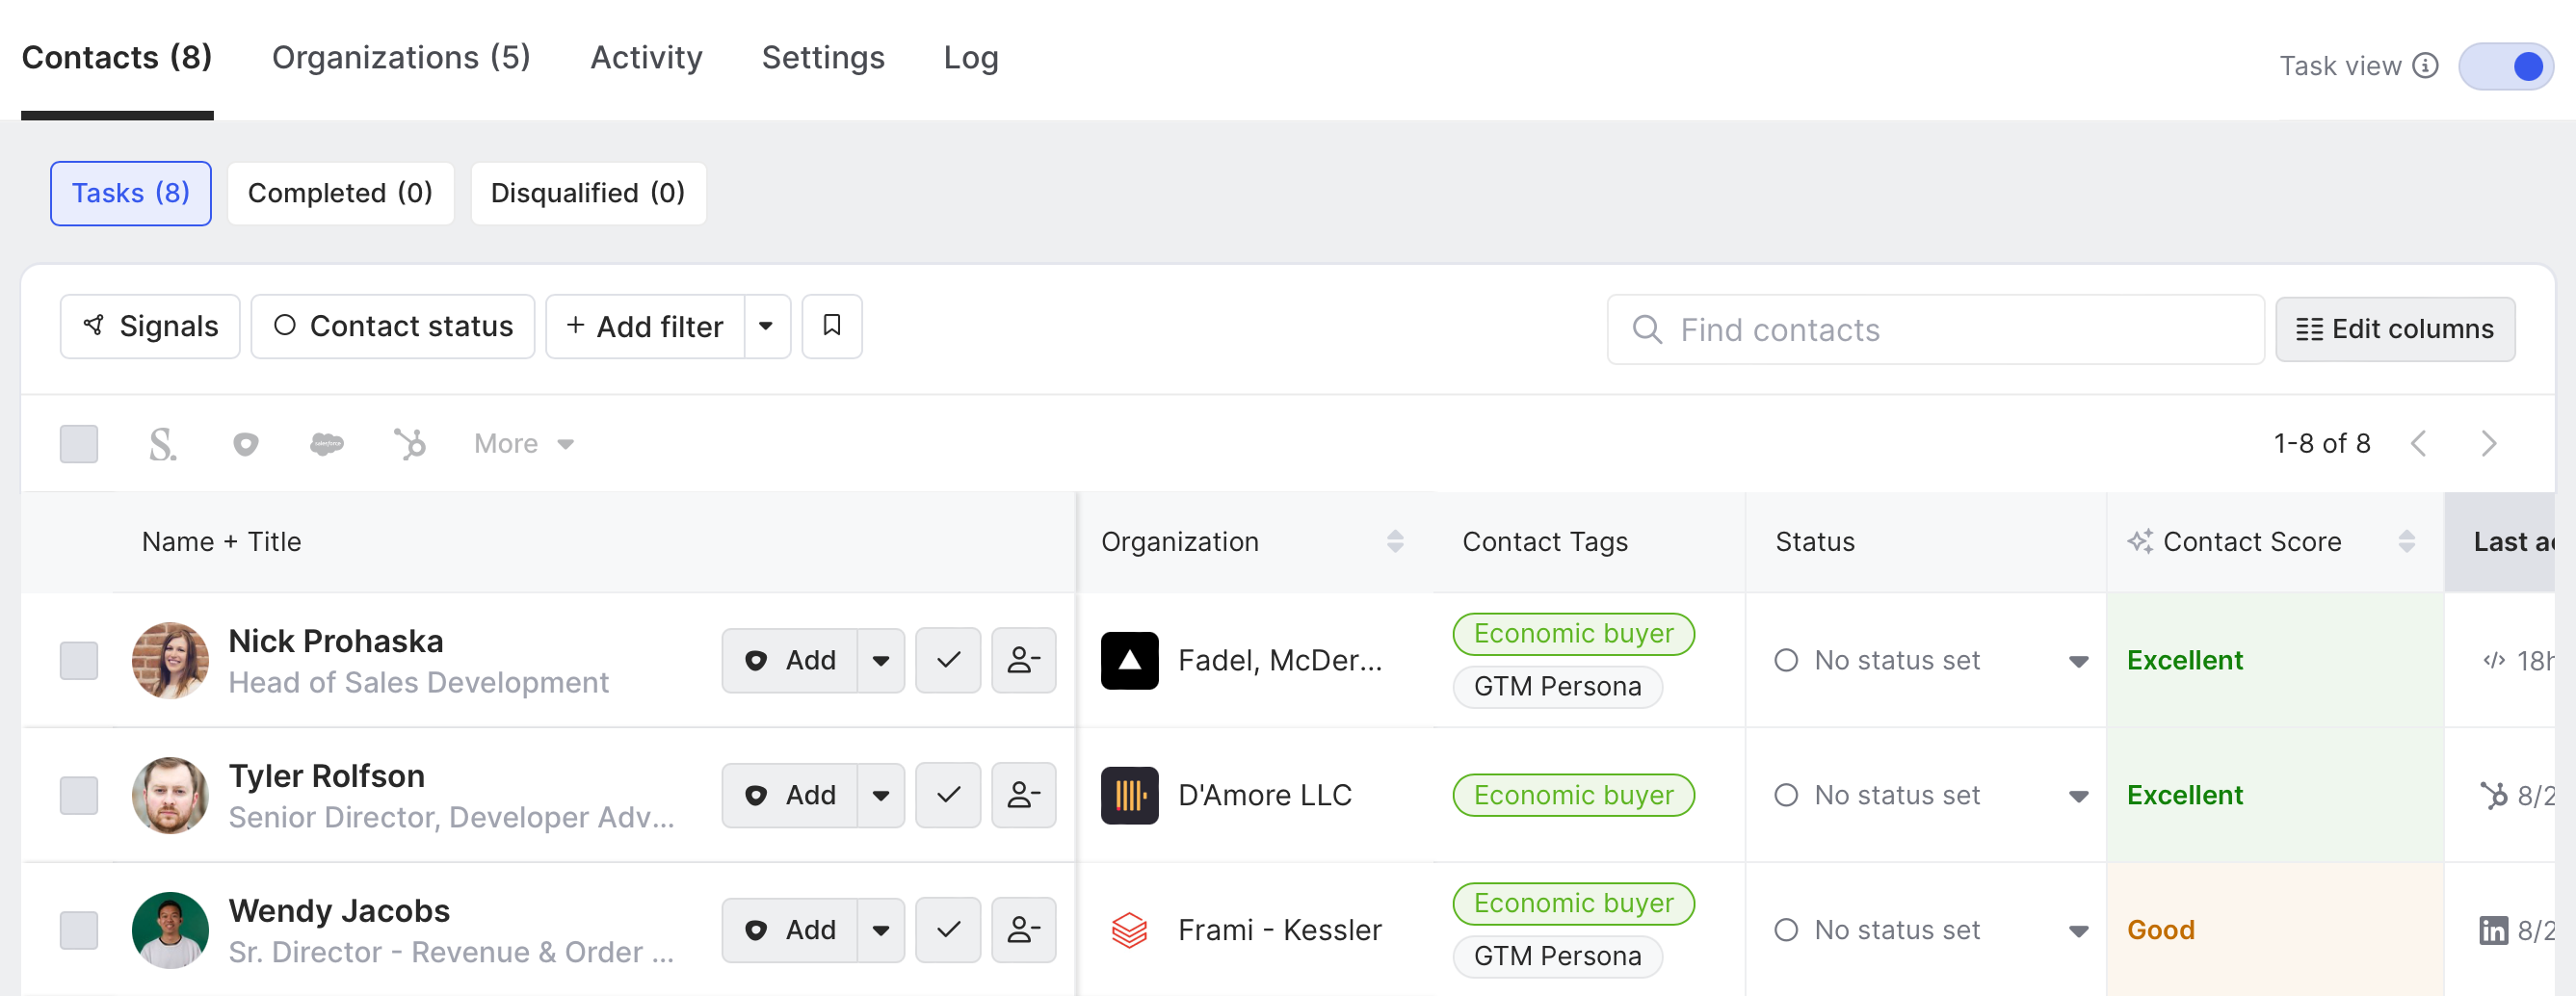
We’d log in to Common Room and navigate to Segments.

Common Room’s segments feature allows you to automatically add individuals or organizations to auto-replenishing lists based on customizable criteria. This makes it easy to quickly surface, monitor, and engage specific people and companies at scale.
We can create a segment for contacts based on any combination of buying signals and fit criteria we want, from website visits, product usage, and social engagements to job title, industry, and annual revenue.
Every unique signal and firmographic detail—as well as associated volume—is at our fingertips.
We can also score accounts based on person- and account-level signals and fit criteria, trigger an automation in Common Room to find high-fit prospects associated with that account, and add them to any segment we want automatically.
ProspectorCommon Room’s Prospector feature allows you to search through a proprietary, constantly refreshed database of more than 200 million B2B contacts and organizations, surface prospects and companies based on custom criteria, and automatically add individuals as contacts—even if they’re not currently engaging with your organization on any connected channels or tracked in your CRM.
We can experiment with different signals to identify which ones correlate with stronger intent, then build out more robust retargeting to align our ad budget, creative, and CTAs with the degree of intent implicit within each signal.
Keep in mind that the minimum audience size for a LinkedIn Ads audience needs to be greater or equal to 300 contacts. We can’t run campaigns on anything smaller.
In this example, we’ll focus on socially engaged prospects—economic buyers who have reacted to or commented on our LinkedIn content, are not current customers or competitors, and who fit our firmographic criteria for company and role.
We’d click New segment, select Create new segment for contacts, and add our filters.

Common Room’s filters feature allows you to highlight individuals and organizations based on any combination of factors. This makes it easy to surface specific people and companies based on firmographic details, cross-channel activities, product usage, and more.
Once we click Save, our segment will be auto-populated with every person tracked in our digital ecosystem who matches our criteria.
Common Room’s AI-powered identity resolution and waterfall enrichment engine—Person360™—will automatically reveal the people and accounts behind buying signals.
Common Room’s Person360 feature allows you to deanonymize, merge, and enrich signals from every channel connected to Common Room. This makes it easy to reveal the identity, intent, and context of every buyer and customer.
Now that our segment is good to go, let’s make sure we can serve up the right ads to the right buyers on autopilot.
Step 3: Create webhook workflow
We can auto-add contacts from our segment in Common Room to the right audience in LinkedIn via Zapier.
First we’d go back to Zapier and create a new Zap.
We’d choose Webhooks by Zapier as our trigger and select Catch Raw Hook as our trigger event.

Zapier will provide us with a URL we can copy and paste into Common Room. This will push the person-level insights captured in Common Room to our LinkedIn Ads account.

We’d go back to Common Room, navigate to Settings (the little ⚙️ icon at the bottom of the left sidebar), and click Webhooks.
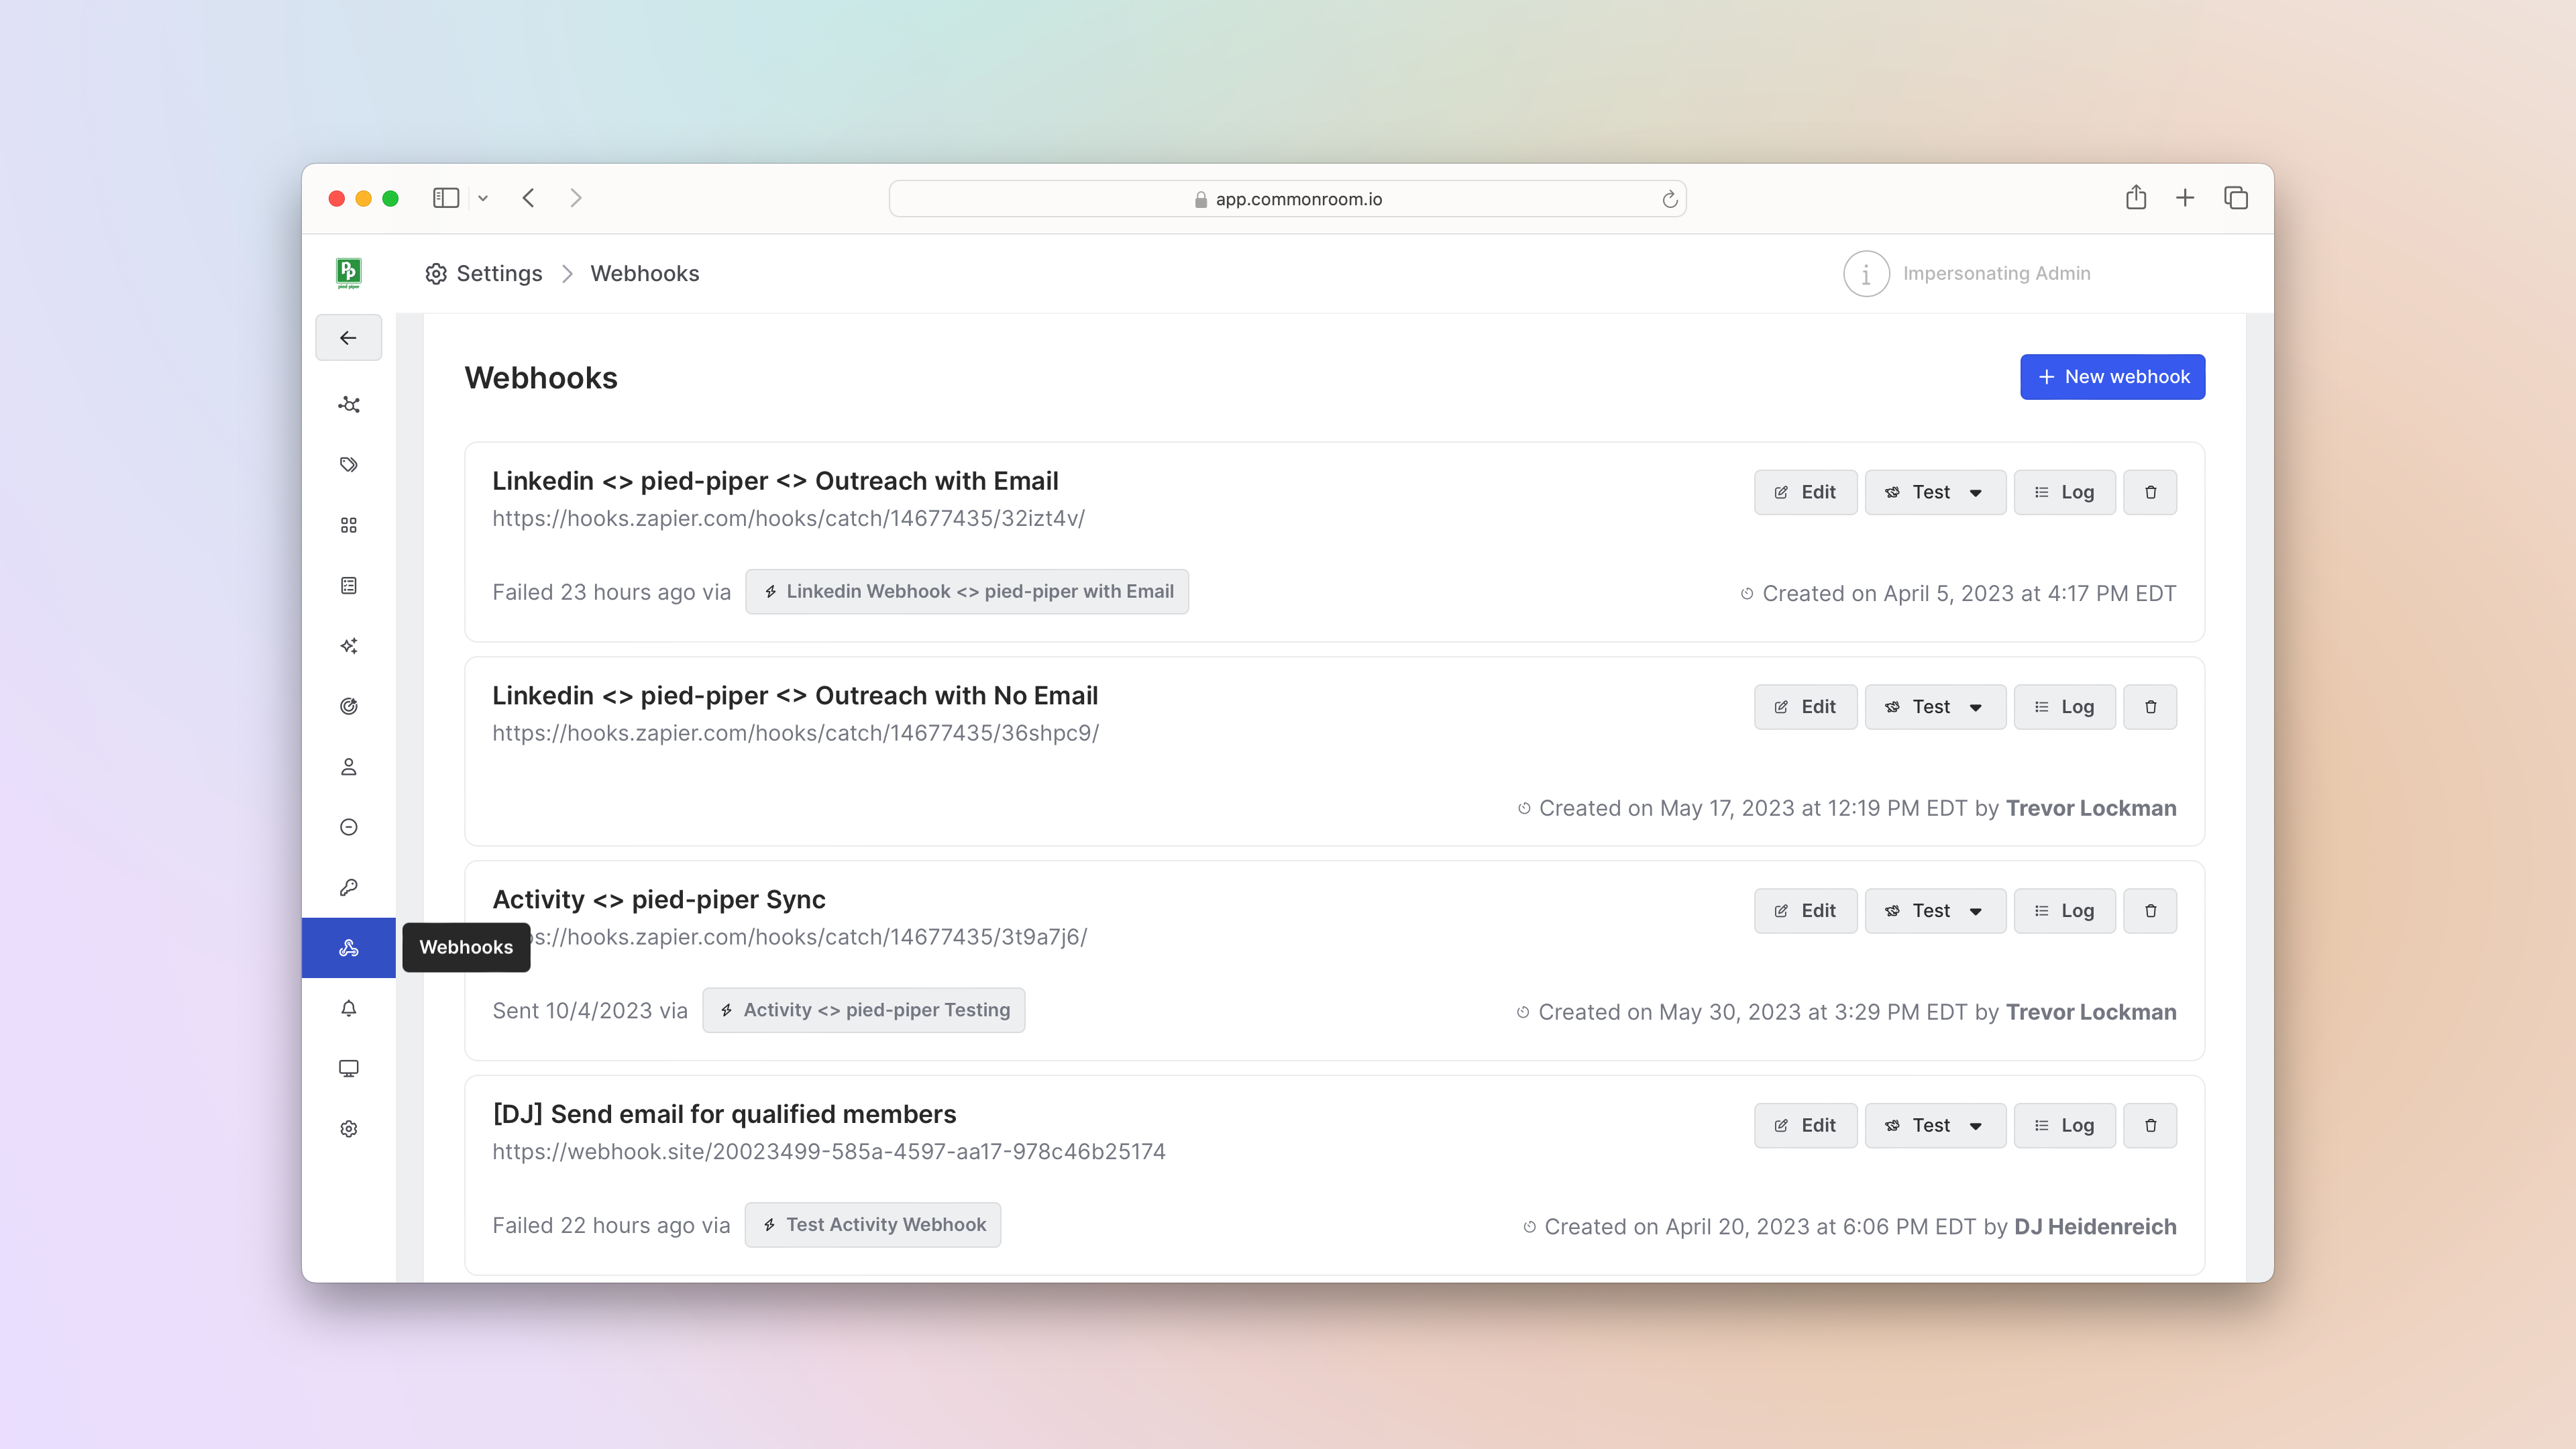
We’d select New webhook, give it a name, and copy-paste the Zapier URL into the Payload URL section.

Common Room’s webhooks feature allows you to send contact- and organization-level signals and firmographic information from Common Room to external services. This makes it easy to share real-time data between applications based on predefined events.
Once we’re done, we’d click Save changes, head back to Zapier, choose Code by Zapier as our action and select Run Javascript as our action event. This will help us parse the info from Common Room and put it in a format readable by LinkedIn.

Zapier can help you generate code via AI, but we already know what code snippet we need:
const nestedJSON = inputData.nestedJSON ||
'{}';

// Parse the nested JSON string to a JavaScript object
const data = JSON.parse(nestedJSON);

// Extract the required fields from the parsed data

output ={
primaryEmail: data.payload.primaryEmail || '',
organizationName: data.payload.organization?.name || '',
domain: data.payload.organization?.domain || '',
linkedinUrl: data.payload.linkedInUrl || '',
country: data.payload.organization?.location?.country || '',
fullName: data.payload.fullName || '',
title: data.payload.title || ''
};
LinkedIn requires both a first name and last name for ad targeting, so our next step is to add another action in our Zap that will split “Full Name” into “First” and “Last.”
We’d choose Formatter by Zapier and select Text as our action event.
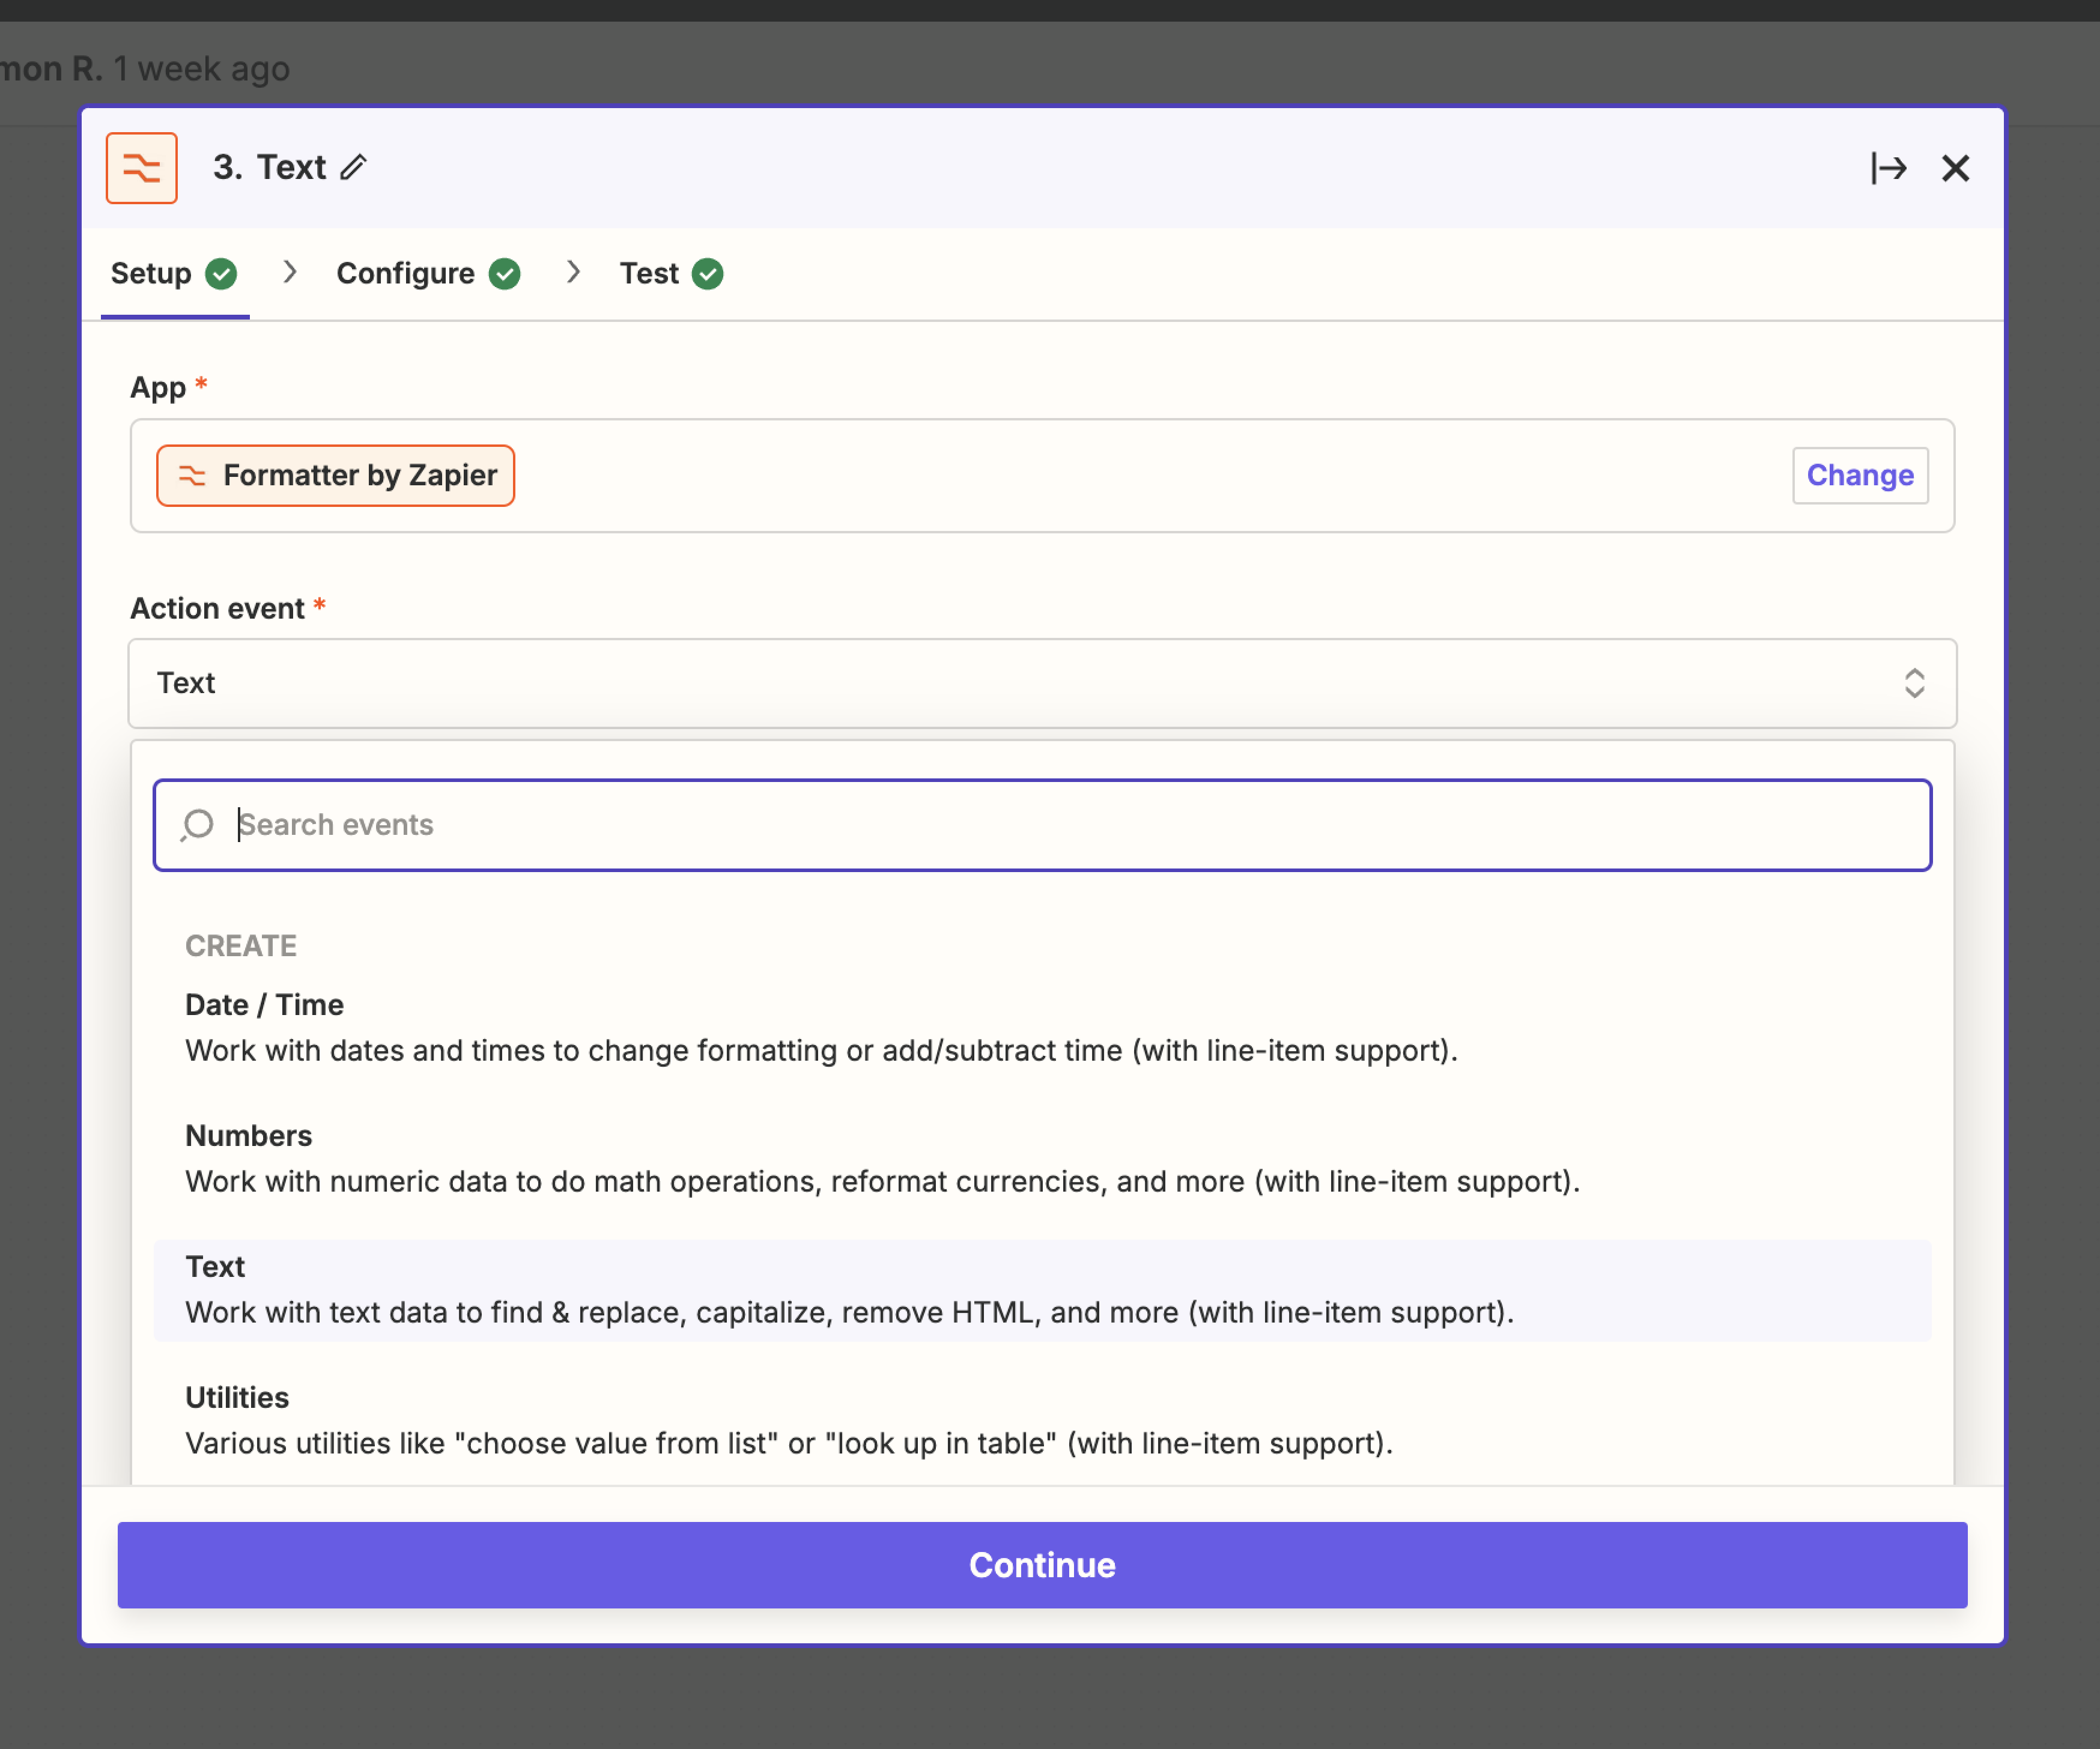
The text we need to add to the Input section is “Full Name.” Then we’d type “[:space:]” in the Separator section and select “All (as Separate Fields)” for the Segment Index section.

After we separate first and last names into two separate outputs, our final step with this Zap is to add another action.
We’d choose LinkedIn Ads and select Add Contact to Audience as our action event.

Then we’d map over the relevant fields, including the exact LinkedIn Ads audience we want contacts sent to. The more fields we fill in, the better our match rate.

Once we’re done, we’d hit Publish.

Now we’d go back to Common Room, click Back to app, and navigate to Workflows.

Then we’d click New workflow and choose Trigger a webhook for a new contact.

We’d add a filter for the segment we created earlier.

Next we’d choose the webhook we created from the dropdown menu.
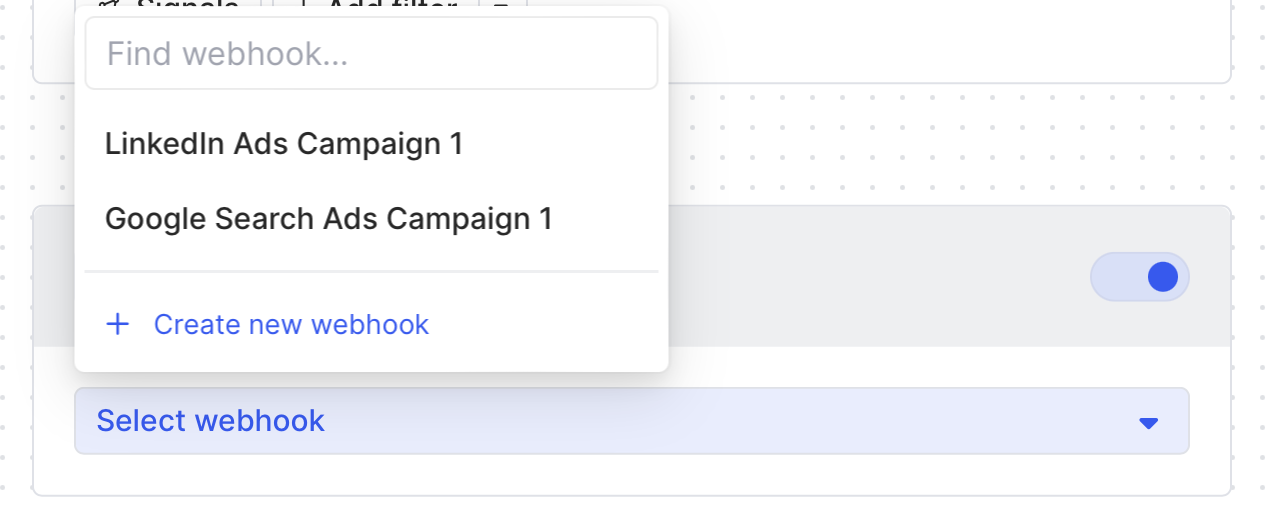
Then we'd click Save and we’re done.
Now any time a contact is added to our segment in Common Room, they’ll automatically be sent to our LinkedIn Ads audience via webhook and Zap.
Step 4: Automatically run ads against dynamic, highly targeted audiences
We can go to our LinkedIn Ads account and see the audiences our new workflow is building.
This will likely take a few days, but we should expect to see 70-85% match rates based on the info from Common Room.

From here we can spin up net-new LinkedIn campaigns that include our Common Room segment within the campaign targeting criteria or we can add the segment to the targeting criteria within an existing campaign.
Either way, we’re now serving up ads to high-intent audiences based on all the signals and fit criteria captured in Common Room.
Wrapping up
And there we have it.
Now you can not only serve up ads to prospects who match your ideal customer profile, but also focus your ad spend on people showing real interest in you and your product.
Want to see a playbook on a different topic? Get in touch. And if you haven’t already, try Common Room for free.
We think you'd like these
Playbook
Prospect on LinkedIn 10x faster
Go from LinkedIn profile to pipeline in seconds.
Playbook
Prospect from any LinkedIn post
Capture the people behind posts, reactions, and comments with a click.Playbook
Find and enrich any high-fit company or prospect in a flash
Spotlight ICP-match accounts and ideal personas lightning-quick.